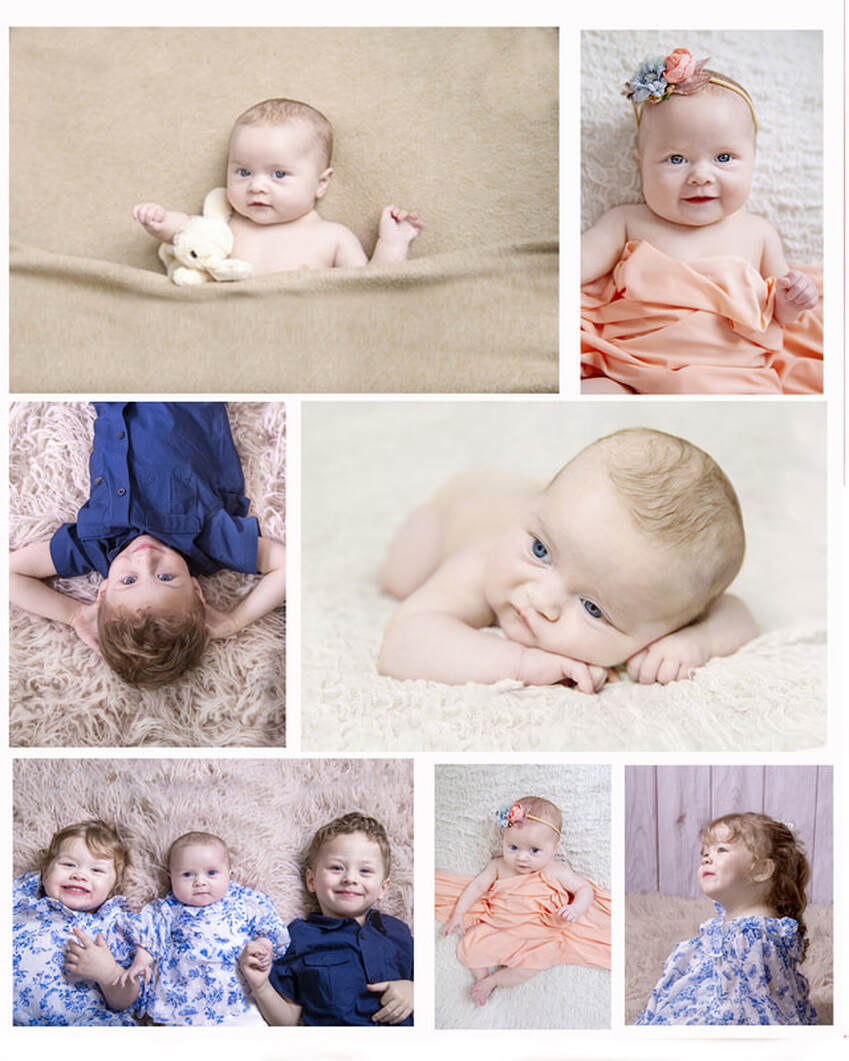
3 Month session with baby Kaylee Frisco, TX Baby Photography shoot |
fF
|
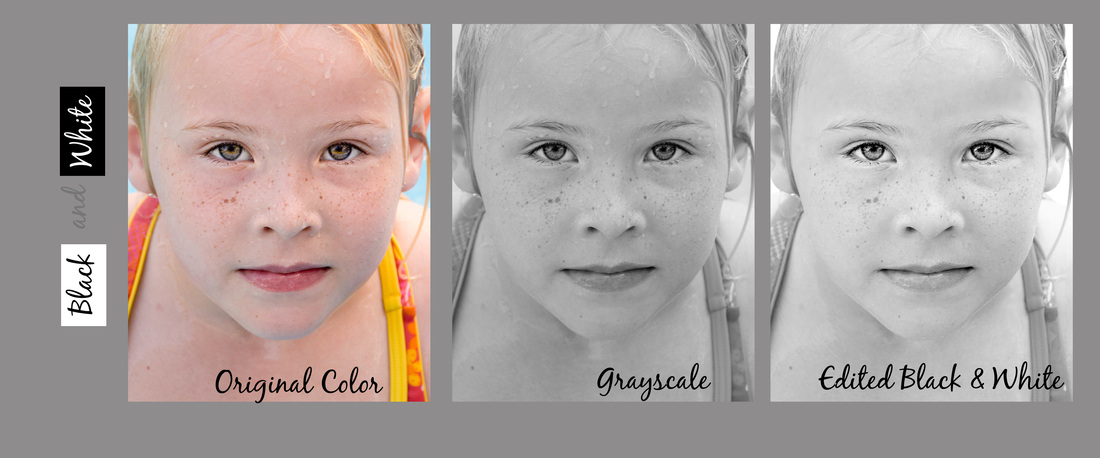
Black and white conversion. It's more than just removing the color from a photo. What makes a good black and white? How can you tell the difference? Here are some things to look for when you are looking for a photographer for your black and white portraits. Or even if you are working on some black and whites of your own photos. For an example, I have a photo that I took this summer that I just used in a recent photo contest. (I won a judges recognition award for contrast--woo hoo!) The photo on the left shows the original color image. In the middle picture, I have simply removed the color. The far right shows my final edited black and white portrait. (My final edit included removing some water droplets and sharpening also.) Hopefully, you can see and feel the difference in the two examples. Neither has color; but the final photo has a spark and energy that is missing from number two. It feels more interactive and alive. Her eyes are more engaging. Sometimes people will print a color photo in "grayscale" or just take the saturation all the way down to zero. The middle picture is that result. It is sometimes described as 'muddy,' meaning the lights and darks mix together without as much contrast. In a black and white photo, there should be black-blacks and white-whites with different tonalities in between. A quickie conversion is usually gray, gray and more gray. That being said, there are all different types of images with different styles of black and white. A low-key image might be very dark and moody. Dramatic photos will have a lot of contrast with dark blacks and bright whites and less gray. Sometimes an artist wants a softer, lighter look with less contrast (I sometimes prefer this look for newborns, as it can seem gentle and sweet.) There is no hard and fast rule concerning someone's choice in creating a black and white photograph. However, not many people would want to see their loved ones in a sickly gray light. Skin is one of my main concerns when creating a black and white portrait-possibly second to eyes. The last thing I want to do is to give some sweet child a zombie-like pallor. I want to showcase the intensity, or joy, or whatever emotion we have captured that day. I want to be sure that the subject isn't blending into the background, also. A crisp black and white will usually go a long way toward these goals. So, how to convert to black and white? Ahhh, there so many answers to that question. I have seen heated debates among photographers as to the the best way, or the right way. I have tried a lot of them. When I was first starting out, I tried some actions. These are
pre-recorded steps that run mostly by themselves in Photoshop (or Elements, at the time.) There are some pretty good ones out there, some of them free. (Pioneer Woman, has some. Or Rita at CoffeeShop.) They can be fun to try and play around with. However, here is my warning - *actions are usually overdone.* They almost always need to be adjusted, or you will wind up with blown-out whites or other issues. If in doubt-always lower the opacity. And then probably lower it some more for good measure. Moving on, I used a black and white gradient layer for a long time. After losing the color, I would adjust the levels and curves, etc. to get the look I was after. That works pretty well, too. I soon discovered the actual "black & white" adjustment in Photoshop. This has sliders that let you adjust the lightness/darkness of individual colors, which I find very helpful-especially if someone in the photo is wearing something that is distracting or competing for attention. I will go back and forth between the gradient method and this one still. Another tool for creating a black and white image is actually shooting in monochromatic mode. I recently attended a workshop with Kevin Focht. He had all of the photographers switch the mode right on the camera, so that we were actually viewing the initial images in black and white to start. (He does a lot of 1940's glamour-style lighting, which was beautiful.) So simple, but this is really effective if I'm shooting with black and white in mind. I can easily tell right on the back of the camera what the final product will look like. Then, since our eyes are naturally drawn to the whitest part of a photograph first, I can see where I might need to adjust lighting to get the focus where I want it to be for composition, etc. I will still tweak these, but it is a much simpler process if I am purposely working it out on the front end. These are by no means the only methods. But for those who are interested, it might be a good start, or something different to try out. I'm all about experimenting and learning new things!
0 Comments
Leave a Reply. |
AuthorI am a newborn photographer in Memphis, TN. Archives
April 2013
CategoriesTrusted and Verified |